Saltwater Flies

Well, I finally had the chance to sit down and tie some saltwater ties. In reality this is going to be the bulk of my arsenal since there aren’t too many freshwater opportunities around me. This isn’t a bad thing. I really look forward to being able to land a nice slot red, flounder, or trout. Maybe even a nice snook! Of course I’d take any combination or all of the above. 😉

I was hoping to spend a few hours taking a fly tying class down the street at Black Fly Outfitters but I was the only person to sign up and it was cancelled. So I’m off on my own for a while longer since I don’t have another weekend open until November. So these may not be pretty but hopefully they’ll work.

First off the vise was a red/white Clouser. It was my first fly with artificial eyes. They’re kind of a bugger to put on but I think it came out ok.

Clouser

I stopped in to the Salty Feather the other day and walked out with some popper sets and a new (to me) hair stacker. They didn’t have any stackers other than a $30 one I didn’t like (nor would I pay that much) so John sold me one of his own. It’s actually better than what I was after in that it’s double-sided. I decided to match my body to my popper head and this is what I ended up with. For the popper I used doll eyes which I superglued in place. They should add a nice little rattle in the water. I also put a little hackle around the neck so hopefully that’ll work out well for me.

Popper

Finally I decided to try my hand at the Buck Deceiver. This is supposed to be a great and very flexible fly. I’m not 100% sold on my technique with this one but we’ll see. I really need to compare it to some better samples.

Buck Deceiver

One thing I’ve realized is that I need bucktail in solid colors. With the exception of black my entire stock is two-tone. I don’t feel that I can really grab enough of a single color. I’m going to try to rectify that this weekend. 🙂

I don’t know if any of these will actually work but I’m sure having a fun time making them. 😀

I’m a Fly Tyin’ Machine!

I’m either going to have to start taking flies apart or stop at the shop on Tuesday to buy more hooks. Practice makes perfect and that’s what I’ve been working on. Sure, I have a long way to go but what a fun thing to be learning!

Since I got off early Friday I picked up some more fly tying goodies including some foam sheets. I picked a nice light green to make my own grasshopper flies. I don’t know if I’d bite if I were a fish but they sure seemed to like it today. I ended up catching 10 nice bluegill on this fly.

DIY Hopper

There really is a great sense of satisfaction and accomplishment catching a fish on something you fashioned with your own hands. The feelings are further amplified when it’s a repeated success. There were more strikes than those I caught which tells me it was working incredibly well. The fish were hitting it hard and fast almost as soon as it hit the water. I just need to work more on setting the hook and landing the fish.

Even though I didn’t snag them all I had a great time with my son and was thrilled to see how well the fly was working. This is the first guy pulled from the water on my DIY hopper.

DIY Hopper Success!

I suppose in the spirit of full disclosure I should say that my son pulled in 12 of his own fish on his crappie pole. He’ll tell you 13 but that’s because I caught one for him and let him pull it in. I’m surprised he didn’t count the three I let him pull in with the Tenkara rod. 🙂

Hoping that I’ll have time to work on some more flies with my day off tomorrow I hit Barnes and Noble with the dream of finding one or two fly tying books. To my surprise they actually had some! Unfortunately all but one were fairly specific to trout, salmon, and other non-Florida gamefish. Fortunately they did have a copy of Essential Saltwater Flies which has excellent pictures in their step-by-step narratives. I don’t have the supplies to work on many of the included patterns but I should be able to knock out a couple.

In the meantime I decided to try my hand at a slightly larger fly than what I’ve been making for the panfish. Using a #6 hook, some black chenille, and white hackle I created my first Wooly Worm.

Wooly Worm

I’m not 100% satisfied with it but I think it turned out pretty good for working from scratch. This one wasn’t in the book I got but I’ve seen several variants of it.

So there ya have it. I can’t wait to hit the trail again. This time I’ll have an arsenal of flies and my Tenkara rod!

Let’s Tie Some Flies!

Today I read that most people that begin fly fishing start tying their own flies within 1-2 years. I suppose I’ve thrown the curve as I’ve already jumped in with both feet. I was browsing craigslist and decided to see if any fly tying gear was available. To my surprise and delight I found a new ad with a nice Griffin 2A vise, misc materials, and a few other tools. I quickly responded and was very happy to learn that everything was still available and I closed the deal over the phone.

We met yesterday after work and did a quick Wal-Mart parking lot swap. Unfortunately I didn’t have some things I needed to get started right away so I had to wait until today. I apologize for the poor image quality. I seem to have misplaced both of my cameras and I’m relegated to my smartphone. Anyway, here’s the cache of goods and the vise. I’m quite pleased!

Fly  Materials

Fly Vise

I didn’t have enough time to stop today but I’ll be picking up a base for the vise tomorrow. The Griffin has a clamp base but I don’t like where it has to sit on the table. I want more flexibility to move it around. I did pick up some very quick things today, though, and here’s the result. Unfortunately I tried shooting through my mag light and the initial images royally sucked. Only the last ones were halfway decent.

Black Ant
For my first fly tying project I decided to try a black ant pattern. I figured the bluegill might like those. Up to this first picture I’ve wrapped the hook with black dubbing to create the back of the abdomen. Unfortunately one of the things I forgot to pick up is dubbing wax so the material didn’t stick to the thread very well. As you can see in the pictures it’s quite messy looking. I am now tying the hackle (feather) to the hook.

Tying Hackle

After tying the hackle around the hook I added more dubbing material to the thread and wrapped the rest of the body. Here I am using a Matarelli whip finisher to put a professional (looking) end to the tying job.

Finishing Body

After finishing the whipped end this is what I ended up with. So here it is, my very first fly. It ain’t real purty but hopefully she’ll catch me a fish.

My First Fly

Goodness these pics are bad! I promise to try and find the cameras soon!

Oh well, so that’s it. I’ve officially made the foray into the wonderful world of fly tying!

I’m Warm and Fuzzy with My New Underquilt

Having taken advantage of the recent sale by Arrowhead Equipment I am now the proud owner of a Jarbridge River underquilt. The Jarbridge is a 3/4 quilt that’s rated to 30 degrees. I purchased it with the plan of using it with my son’s Hennessy Scout quilt. Typically it would require a short foot pad to keep the tootsies warm but he’s small enough that it should be a full-size quilt for him. :-0

I’ve misplaced my scale but AE says it weighs under 20 oz. It’s more bulky than my down quilt but that’s understandable being a synthetic. In my initial test it seems like it’ll be very cozy. It’s also very well made. I’m quite happy with the purchase and certainly with the price. 😉

The UQ is reversible with coyote on side and woodland camo on the other. I have to say that it looks quite nice. It measures 42″x58″.

Jarbridge Coyote

Jarbridge Woodland

Tenkara Fishing

It was a long wait but I’ve finally begun my journey down the path of enlightenment brought about by fly fishing. If you’ve ever watched a skilled fly fisherman I think you’ll agree that there’s something almost spiritual about it. If nothing else there’s certainly a beauty about watching the line sailing through the air as it delivers the fly to its prey. If you watch me with my new Tenkara fly rod it will conjure horrific nightmares of fiery crashes of death. While I managed to (how I still don’t know) not get a fly stuck in my body I spent a great deal of time untangling the horrid mass of line and tippet I’d created. Nothing’s worse by being mocked by the very fish you’re trying to catch.

Earlier this month I ordered a 9’6″ Tenkara rod from tenkara-fishing.com. Tenkara is the most simple form of fly fishing as it entails just a rod, line, tippet, and fly. There is no reel. No stripping of line. Your line is a fixed length not unlike a cane pole. However, I can attest that it’s a thousand times more sensitive and responsive. I love my crappie pole for its fact action but the Tenkara blows it away!

Tenkara originated around 200 years ago in Japan. It has provided the Japanese fisherman living near mountain streams with the ability to provide food for his family. Today it’s providing me time with mine. I hope that my son will keep the fire and keep begging for me to take him fishing.

My rod arrived in a nice, plastic tube and included a nylon carrying case. I’ve misplaced my scale but the thing is incredibly light (mfgr says 2.5 oz). I ordered a furled line and a level line along with misc accessories. I purchased three types of flies: Sekasa Kebari, Yamagat Sendai Kebari, and the mini hopper (a western fly).


My package arrived yesterday but I was only able to get out today. I selected the mini hopper for my inaugural fly and it worked well. The bluegill seemed to really like it. Before long I had my first bite.

Fish On!

The rod felt great as my prey fought back. He pulled left and jutted right. Adrenaline started coursing through my veins. My heart was beating furiously. The battle lasted for an eternity until I finally landed the massive beast!

Fish On!

I ended up landing three more of these maniacal creatures before I succumbed to the heat and the siren call of a Leinenkugel Sunset Wheat. The rod collapses within the handle and I’m using a foam line holder which fits around the rod itself.

Fish On!

Fish On!

All in all a great day with a new rod. I can’t wait to really put it through it’s paces.

Meet the FTA Director

Last night we had an impromptu meeting with the North Florida Trailblazers to meet the Florida Trail Association’s recently hired Executive Director, Dennis Miranda. We had a good turnout with close to 20 people. Some folks traveled from as far as Palatka and Gainesville to make the meeting.

For close to two hours Dennis shared his visions for the FTA and how he plans on accomplishing some of the goals. We spent a good portion of the time giving him a pulse of the chapter to see where we are and where we need to be. Overall we’re not doing bad as a chapter but can certainly do better at reaching new members/volunteers.

Dennis Miranda, FTA Executive Director

FTA Executive Director Dennis Miranda takes notes while addressing the North Florida Trailblazers chapter in Jacksonville, Florida.

I think we’ll see some great things happening throughout the state and hopefully sooner rather than later. It was nice to have representation from one of our local land trust managers and to hear about some projects they’re working on. It was refreshing to see some new faces at the meeting and some relatively new members also interested enough to be there.

I’m looking forward to some more training opportunities and hope to be able to help provide some myself. Things are looking up, Florida! If you haven’t done so already, join us and help promote and support our Florida National Scenic Trail!

Yes, I DID Need Another Stove

You see, sometimes we can’t always control the impulses we have. Perhaps you struggle every time you see a candy bar or walk by a soda machine. For me, my fingers start to twitch and the hair on my neck stands up when I see a new stove.

It was for this very reason that I knew it wouldn’t be long before the new Emberlit wood stove found its way into my collection. Oh sure, I talked big. I said I’d wait for the titanium version. I acted like it didn’t interest me. But deep inside I knew they were all lies.

This weekend I came clean with myself and admitted that I need help. Ok, so I didn’t really go that far, but I did order one. Talk about amazing service! Keep in mind I ordered it at about 11 am on Saturday. By 3 pm I had a shipping notice. It was in the mailbox when I got home today!

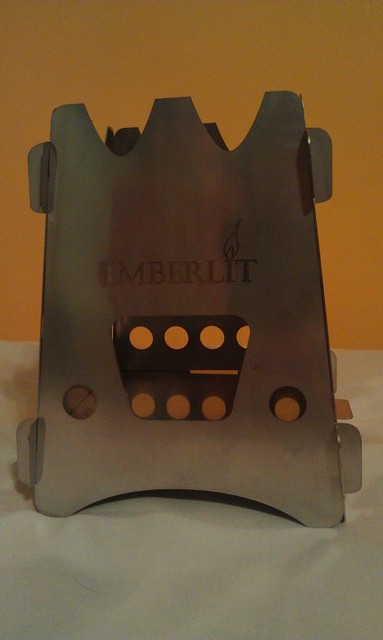
It’s late and I’m tired so I’ll keep it short for now. Hopefully I’ll have the chance to test it out sometime this week before heading back to Disney and the Magic Kingdom. Here’s a quick phone pic to whet your appetite, though.

Emberlit Stove

Might As Well Fish

It’s been too insanely hot around here lately to hike. The highs have been in the upper 90s with the heat index running over 110. The area is like a tenderbox waiting for an ember.

The past few days my son and I have hit the retention pond across the street to at least say we’ve been outdoors recently. He’s been more interested in catching minnows in his net than learning to cast but we make a good team. We also have an aquarium full of minnows.

We’ve only had a little success. I figure it’s because the fish aren’t as dumb as we are and they’re trying to stay deeper and under the plants to stay cool. Today, though, we became fish slayers. While we hadn’t seen a single sign of anything larger than the minnows I decided to ditch the nice spin cast reel in favor of my new 16′ crappie pole.

We really hit a nice hole! There was a single lilypad about 20′ off the bank. It was an easy shot with 10′ of line. Using some moldy bread we started hauling them in one after the other. We made a good time. I’d catch and he’d net. I tried to convince him to take the rod but he just said, “I think I’ll stick with my job.” I’d originally planned on putting them all on a stringer but after these three decided to just catch and release. In the end we let them all go. It’s not like I plan on eating anything from the pond. 😉

Bluegill

These little buggers were excellent bait thieves but sometimes I’d catch a couple in a row. As soon as the bait hit the water I’d pull another fish in. The sky was getting darker, though, and the thunder was rumbling in the distance. We finally grabbed our stuff and ran for the house as the lightning started flashing around us. We probably stayed out longer than we should with the weather but we were having a great time.

I figure if you can’t hike, you might as well fish. And if you can enjoy time with your child at the same time it’s even better. If you can’t get your boots in the dirt I hope you can at least keep a line wet.

Wilderness First Aid – Day 2

WFA Patch

Wow! What a jam-packed day! Yesterday seemed full until we kicked off this morning. After a short review of putting all of the topics together we jumped right into our final CPR assessment. Everyone saved their dummy. It was a beautiful sight!

CPR Final Assessment

Having passed CPR with flying colors we moved on to signs/symptoms, treatment, and “live” scenarios. We covered bone & joint issues, such as dealing with the largest wilderness offender, strains and sprains, which account for 50% of all wilderness medical incidents.

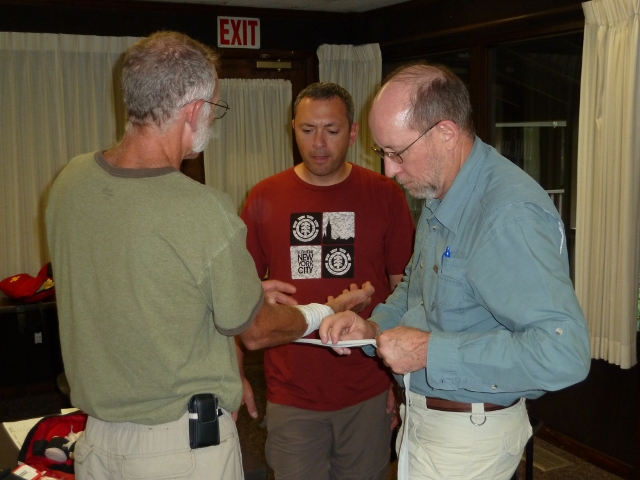
We moved into head, neck, and spinal injuries next. This covered from superficial injuries to severe brain injuries. Next we moved down the body and covered various chest injuries. After some lecture and hands-on demonstrations on treating bleeding and punctures it was time to try our hand at bandaging.

Bandaging Exercise

After some more lecture we did a “live” exercise outside. Our victims dispersed and we went out in teams to find them. My partner and I happened upon a poor lady that had hurt her knee while working on the trail. We didn’t know if it was broken so we decided to not risk it and used her tool to splint the leg. She was very happy. Sorry for the cloudy image. I didn’t realize the lens was still fogged after going from the AC classroom to outside.

Splinting Exercise

The topics continued to come at us in rapid succession: eyes, burns, diabetes, strokes, epilepsy, and abdominal issues. We also covered heat- and cold-related issues like heat cramps, exhaustion, and stroke along with hypothermia.

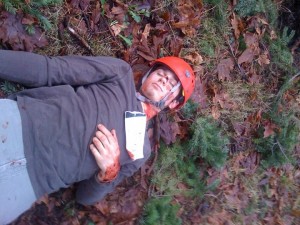
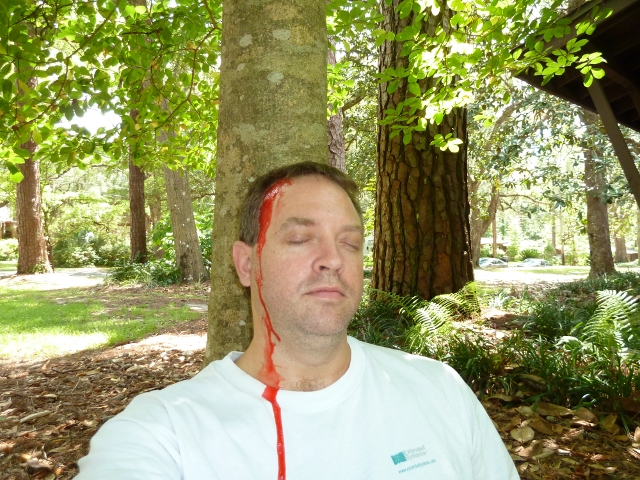
Then it was back outdoors for the final skills assessment. It was my turn to be a victim and I didn’t fair so well. I tripped coming down the trail and hit my head. I freaked when the nice people that stopped to help told me I was bleeding! During their assessment they found that not only had I split my head open but that I also had a stick buried in my back. It was a bad day of hiking. Fortunately they saved my life and I lived to hike another day.

Final Skills Assessment

We wrapped up the course talking about critters like ticks, chiggers, spiders, and snake. And finally we covered water accidents.

There was a ton of information packed into these two days but it was done in a remarkably fun environment. We had great students with great experiences to share and we all learned from each other as well as from the book and instructor.

I really hope you’ll be encouraged to seek out this type of training yourself. If you do any type of outdoor activity where you may find yourself more than an hour away from professional medical help I firmly believe that this education can be the difference between life and death in certain cases.

Happy hiking and stay safe!

Wilderness First Aid – Day 1

WFA Logo

For the past two years I’ve been trying to find the opportunity to expand my first aid knowledge in a way that would be beneficial to my interest in hiking and outdoor activity. I wanted some backcountry knowledge in the event I need to treat myself or my friends. However, beyond that I wanted to step up my role in our local hiking chapter to assist as an activity leader. I realize that if I’m going to take responsibility for others’ safety then I need to add some tools to my arsenal. Putting myself at risk is one thing but I don’t want to do that to anyone else.

To this end I’ve had my eye on the Wilderness First Aid course for some time. Unfortunately Florida isn’t exactly the hotbed of backcountry adventure and finding such training has been a challenge. I lucked upon a course being conducted for volunteers with the Florida National Scenic Trail and since I want to use my skills as a Florida Trail Association Activity Leader I jumped at the chance. It meant a trip out of town and a hotel stay (which is where I’m writing this from) but it’s well worth it in the long run.

We had a full class today with about 16 students. It’s been great meeting folks we might be working with in the future. Even the FTA Executive Director is taking the course right along with the rest of us. Our instructor, Megan Eno, has done a great job of making some potentially dry information interesting and enjoyable. Sharing her personal experiences as well as student stories have helped break the monotony as well.

The Golden Hour
We started off discussing about the Golden Hour. In backcountry terms this is the time you have to determine if you can get the patient professional help or not. If not, then your wilderness skills kick in and your mindset has to change from immediate care until help arrives to a potentially longer-term care of stabilization and maintenance.

First Aid Kit
Next we discussed the basics of a backcountry FAK and addressed items you would add to a group kit. We also covered some luxury items and examined why some items can be left out of a backcountry kit that might be part of your home kit.
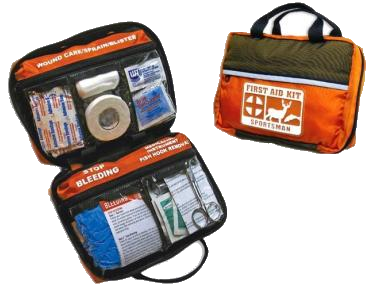
First Aid Kit

We also discussed the importance of avoiding certain things in your kit. For example, you want non-latex gloves to avoid latex allergies. We also discussed carrying non-coated aspirin since it acts faster and time may be critical if you’re dealing with a heart attack.

Good Samaritan
We talked about the Good Samaritan laws and what steps you must take to ensure you’re protected. Surprisingly we also learned that in Alaska and Montana you are legally bound to assist if you are first aid trained unlike the other 48 states.

First-Level Assessment
The three phases of Wilderness First Aid are:

  • Check
  • Call
  • Care

Check is further broken down into:

  • Check your scene
  • Check your resources
  • Check your patient

Bleeding Patient

Anyone with prior first aid training is familiar with the ABCs – airway, breathing, circulation. In the backcountry we add D and E – disability and exposure. The bulk of the day was spent on these five areas and conducting the initial patient assessment both for unconscious and conscious victims.

We repeated various drills with various scenarios and swapped partners each time to broaden our interaction with others. We all have different styles, body types, etc. and all of these play into what we’ll do and how we’ll do it in the field. It was a great way of further cementing the knowledge.

Second-Level Assessment
Once we had a good grasp of the initial assessment we moved in to the second phase. This is broken down into three groups:

  • Visual check (head to toe)
  • Interview (SAMPLE)
  • Vitals

This portion ended with a discussion of treatment, evacuation, and ongoing assessment.

Choking
We wrapped up the day talking about choking hazards and various ways of clearing them both in others as well as ourselves.

Closing
Megan’s real-life examples really added a great deal to the course and I think everyone had gained from them. It’s been very refreshing to have an instructor that’s engaging and visibly passionate about the material and its importance. I’m anxiously awaiting tomorrow’s day of “live-action” scenarios to test and reinforce the knowledge we’ve gained so far.